 Click here
Grid ref SE118154
Crosland Moor Quarry, a small urban-ish venue consisting of a number of small quarries. End Buttress is the best area, especially on sunny afternoons and evenings, with 4 notable problems (18, 19, 20 & 21).
ACCESS
From the A62 Manchester Road leaving Huddersfield take the B6107 Blackmoorfoot Road. Take the right turn onto Ivy Street and park up at the bottom of the road. There is a path that goes left and down behind the playing fields that leads to the quarries.
![]() An easy to print PDF TOPO guide to all the problems can be downloaded from here
An easy to print PDF TOPO guide to all the problems can be downloaded from here
BETA ALERT!
Click on the camera icon ![]() to view images of the problems being climbed or click on the video icon
to view images of the problems being climbed or click on the video icon  to view videos of the problems being climbed.
The Problems
Hovering your mouse over, or clicking on, the name/grade of the problem will show the problem highlighted on the topo photograph below.
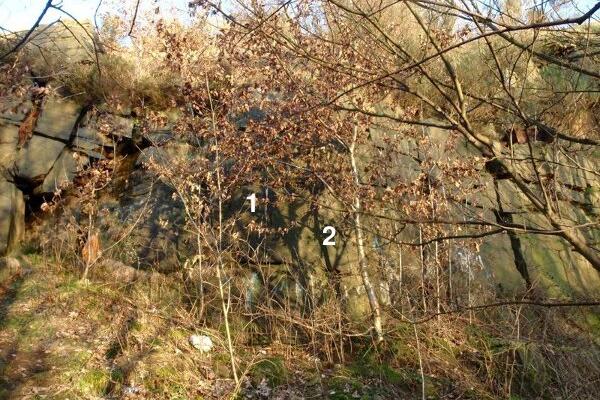
Sector A - Left Quarry - hidden behind some saplings are:
1) Font 3 The blunt paint streaked arete
2) Font 3 The 2 thin cracks leading to a wider crack on the right.
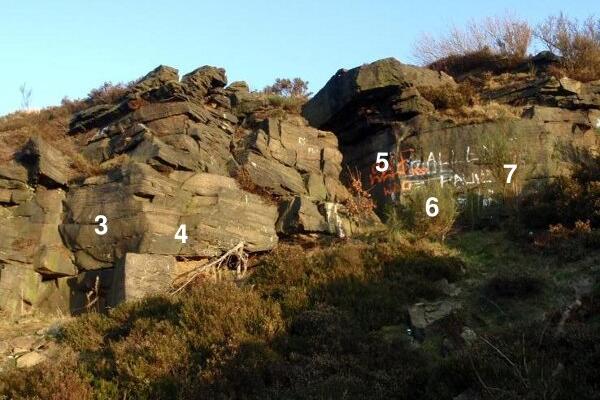
Sector B - Middle Quarry
3) FRONT WALL - S 4b The steep wall in the centre to the ledge and then the cracked wall above
4) BROKEN WALL - VD 3c The wall to the right, lots of options.
5) BILLY THE NOSE - Font 5+ Starting on sandy pockets reach to the sharp holds on the overhang, go through the middle of the overhang and finish with a mantle.
6) Font 4 Small pockets up the wall
7) Font 3 Traverse the wall from left to right.
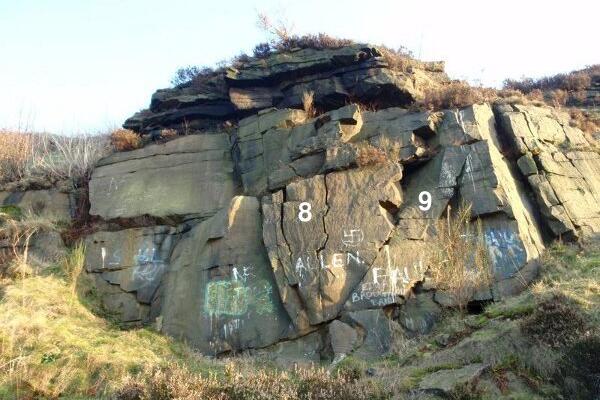
8) Font 3 Twin cracks to the ledge, escape right.
9) Font 4 The rightwards pointing flakes to the ledge then escape right again
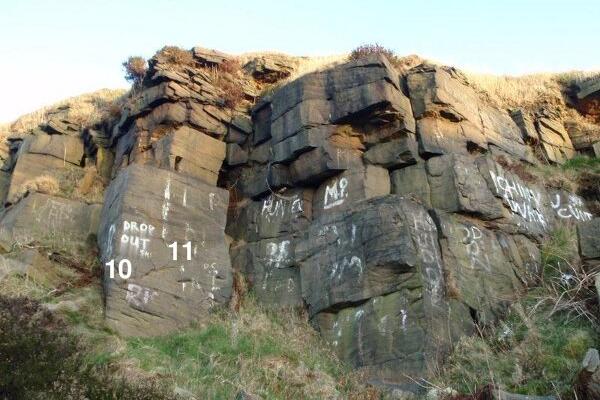
10) DROP OUT SLAB LEFT - Font 3 The left edge of the slab
11) DROP OUT SLAB MIDDLE - Font 3 The middle of the slab
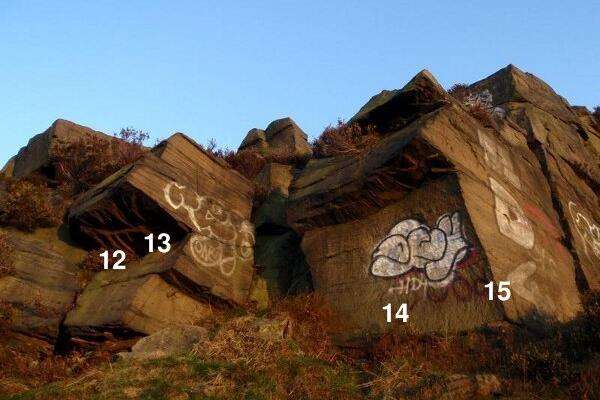
Sector C - End Buttress
12) Font 4 The overhang above the slab, finish on the slopers
13) Font 3 The righthand side of the overhang
14) Font 5+ The centre of the wall and overhang
15) Font 3 The right edge of the overhang using the nice sharp hold
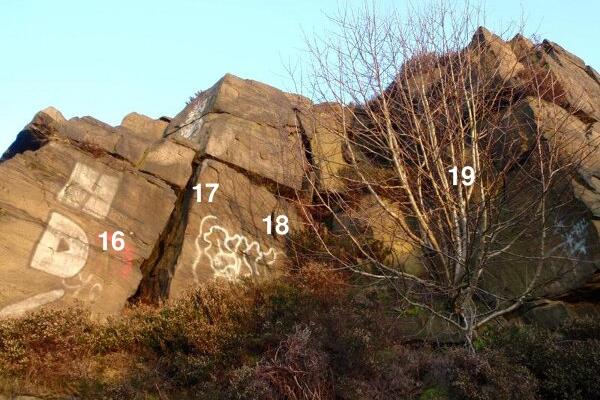
16) Font 3 The wall to the immediate left of the of the crack
17) Font 4 The arete to the right of the crack
18) BLANK WALL - Font 6b+ The middle of the smooth wall, no aretes after the ledge.
19) Font 5+ The wall using the crack, ledge and then the flake (not the tree as the image would suggest!).
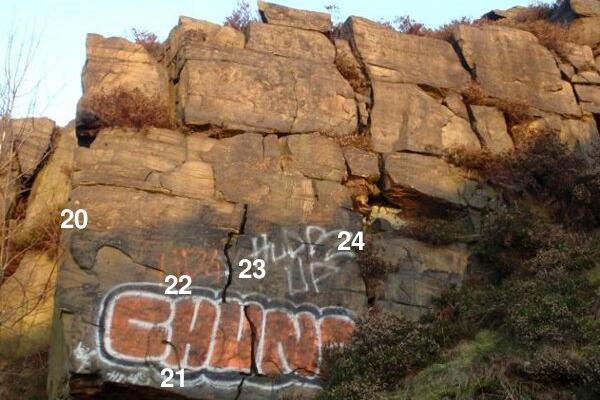
20) Font 6a The arete
21) Font 6c A sit start to problem 22. From the pocket, go right to the bottom crack
22) Font 6a Eliminate, use the sharp crimp and the side pull to reach the break.
23) Font 3 The wall and crack.
24) Font 3 The wall.
Photographs and videos of any problems are more than welcome and can be included on the site.
Details of new problems and opinions on grades will be gratefully received, see the Contact button at the top right of this page or click here